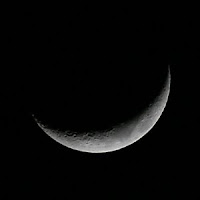
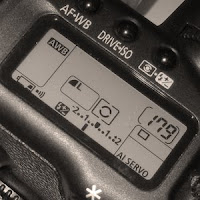
 We know that weather is going to be good and you went out and spend thousands of dollars on your new digital camera equipment, now you need to know settings on your camera to take nice close up photo of the moon.
This tutorial is very simple. All you need to know is how to change metering mode and exposure on your camera. Refer to your manual. However, this is what you need to look for.
If you have SLR camera, then the camera most likely has three metering modes: evaluative [square brackets with circle with dot in the middle], partial [square brackets with circle without a dot] and center-weighted average metering [just a bracket without a circle and dot].
 For taking photo of the moon you will need to set your camera to partial metering mode. This mode is effective when the background is much brighter than the subject or darker, in our case it is darker, and the moon is brighter. The partial metering mode covers fewer than 10% of the viewfinder area at the centre. These modes are usually changed using knobs on the camera, at least in my case on my Canon EOS 20D.
If you have point-and-shoot camera, than most likely you have the following three metering modes that are usually changed using menus: evaluative [square brackets with circle with dot in the middle], center-weighted average metering [just a bracket without a circle and dot] and spot [square brackets with circle without a dot] metering. The spot metering in point-and-shoot camera is same as partial metering in SLR. This is in reference to Canon EOS 20D and Canon PowerShot SD600. The spot metering meters the area within the spot AE point at the centre of the LCD monitor.
In addition to all above you need to find out on your camera how to adjust the exposure. Standard exposure level is when the level mark is in the middle or at zero.
Easy Digital Camera Settings for Taking Photo of the Moon
[0] Set your camera to Programmed Mode P where Av and Tv is automatically adjusted, however, still letting you set all the parameters as asked below. You can do it manually, but why not take the advantage of the camera’s intelligence and save yourself a time. Do not try Fully Auto Mode.
[1] Set up your camera on the tripod or stable object to support your arms.
[2] Set to ISO 200. You do not need higher than that, as the moon is already very bright. Higher ISO will make photo grainy.
[3] Set or ensure that the AF focal point is on the centre of the view finder.
[4] Set the metering mode to Partial on SLR or Spot on Point-and-Shoot. A very important setting, otherwise, the moon will be one big bright ball.
[5] Set focal length to 300mm or 400mm. This is if you have any of the lenses with that focal length, or set to maximum on your lens.
[6] Set Exposure to -1. You may want to experiment with this depending how bright the moon is, some times you may go as low as -2.
Note the Following
Av the Aperture priority mode - is the lens opening
Tv the Shutter priority mode - is the shutter speed
In the P Programmed mode these are adjusted automatically.
REFERENCES
[1] Moon Photography: How To Take Photos of the Moon - Handy Tip
[2] A Bit of Knowledge: How To Take Photos of the Moon - Handy Tip For SLR Digital Cameras
[3] How to Take a Picture of the Full, Half or Crescent Moon? – Part 1: Moon Calendar & Weather Conditions
[4] How to Take a Picture of the Full, Half or Crescent Moon? – Part 2: Digital Equipment Required
Document Release: 0; Document Last Modified: March 03, 2009

Hi Anna! You never cease to amaze me with your wealth of knowledge. By the looks of things I'll have to trade my camera in for one that has all the whistles and bells of a Canon. In other words I will have to get one that's "fair dinkum". Take Care, Peter
ReplyDeleteHi Peter, so you found me here lol. Thanks so much for your kind comment. Hopefully I am not making you spend to much money, lol. Your visit is appreciated always - and happy learning. Anna :)
ReplyDelete